Introduction
Learning to play the violin, or fiddle as it’s commonly known in certain musical styles, is a beautiful and rewarding journey. It’s an instrument that can evoke powerful emotions and captivate audiences with its melodious tones. However, before you can create those enchanting melodies, you need to master the fundamentals of holding the violin correctly. In this fiddle lesson, we’ll guide you through the essential steps of how to hold the violin for optimal playing and comfort.
- Choose the Right Violin Size
Before delving into the specifics of how to hold the violin, it’s crucial to ensure you have the right-sized instrument. Violins come in various sizes to accommodate different arm lengths, so choosing the correct size is essential for comfort and ease of playing. Here are the general size guidelines:

- 1/16 size for very young children (around 3-5 years old)
- 1/10 size for slightly older children (around 4-6 years old)
- 1/8 size for ages 5-7
- 1/4 size for ages 6-10
- 1/2 size for ages 8-12
- 3/4 size for ages 10-13
- 4/4 (full size) for ages 12 and up
- Proper Posture
Good posture is the foundation of playing the violin correctly. Here’s how to maintain the right posture:
a. Stand or sit up straight with your shoulders relaxed. b. Keep your feet flat on the ground (if sitting) or firmly planted about hip-width apart (if standing). c. Hold your head up so that your chin is level with the ground.
- Hold the Violin
Now, let’s dive into the specifics of how to hold the violin:
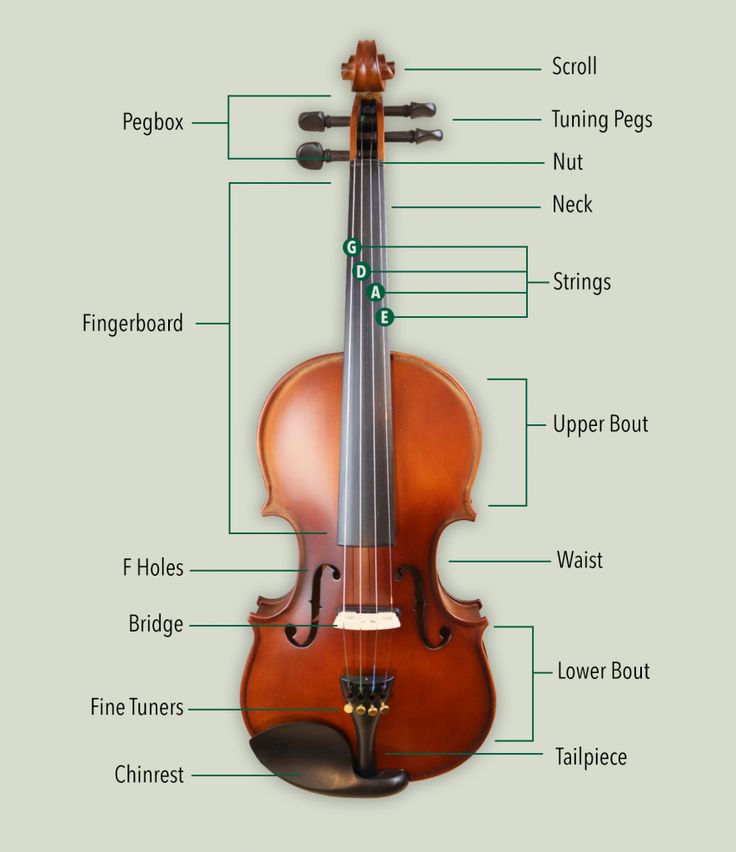
a. Place the violin on your shoulder: Start by resting the violin’s lower bout (the wider part of the body) on your left shoulder if you’re right-handed (or right shoulder if you’re left-handed). The chinrest should be nestled comfortably under your chin.
b. Use your chin and jaw: Gently rest your chin on the chinrest and your jaw on the tailpiece (the end of the violin). Your head should be stable but not pressing down too hard.
c. Support with the shoulder: Your left shoulder should provide support for the violin without squeezing it. Imagine cradling the violin in the curve of your shoulder, allowing it to rest securely.
d. Position the left hand: Your left hand should be under the fingerboard, with your thumb touching the back of the neck. The fingers should be curved, hovering over the strings.
e. Hold the bow with the right hand: While this lesson primarily focuses on holding the violin, it’s essential to maintain a balanced posture with your bow hand as well. Hold the bow with your right hand, fingers relaxed, and thumb curved.
- Practice, Practice, Practice
Remember that holding the violin correctly might feel awkward at first, but with practice, it will become more natural. Start with short practice sessions and gradually increase the time as your comfort and endurance improve.
Conclusion
Learning how to hold the violin correctly is the first step on your fiddling journey. With the right posture and positioning, you’ll lay a solid foundation for developing your skills and creating beautiful music. As you progress, consider taking lessons from a qualified teacher to refine your technique further. Embrace the process, be patient with yourself, and soon you’ll be playing the fiddle with grace and skill, enchanting listeners with your melodies. Happy fiddling!
Mezo