Playing the violin can be incredibly rewarding, but it requires patience, dedication, and a solid understanding of the basics. Here’s a comprehensive guide to help you get started on your journey to mastering the violin.

1. Choosing the Right Violin
- Size Matters: Ensure your violin is the correct size. Violins come in different sizes, and playing an instrument that’s too big or too small can hinder your progress.
- Quality Check: Rent or purchase a violin from a reputable source. A poorly made violin can be difficult to tune and play.
- Setup: Make sure your violin is properly set up with a comfortable chin rest and shoulder rest.
2. Understanding the Parts of the Violin
- Body: Learn about the body, neck, fingerboard, pegs, bridge, and tailpiece.
- Bow: Familiarize yourself with the bow, including the frog, stick, and horsehair.
3. Proper Posture and Position
- Standing/Sitting: Stand or sit with your back straight and feet shoulder-width apart.
- Hold the Violin: Place the violin on your left shoulder, securing it with your chin on the chin rest.
- Left Hand Position: Your left hand should support the neck of the violin, with your thumb opposite your first or second finger.
4. Holding the Bow
- Bow Grip: Hold the bow with a relaxed but firm grip. Your thumb should be bent and placed on the underside of the frog, while your fingers gently wrap around the stick.
- Bow Arm: Keep your arm relaxed, moving it from the shoulder. Your wrist and fingers should be flexible.
5. Tuning the Violin
- Pegs and Fine Tuners: Use the pegs for major adjustments and the fine tuners for minor ones. Start by tuning the A string, then D, G, and E.
- Electronic Tuner: Use an electronic tuner or tuning app for accuracy.
6. Basic Bowing Techniques
- Straight Bowing: Bow parallel to the bridge, maintaining an even sound.
- Bow Distribution: Use the full length of the bow for longer notes and shorter strokes for quicker notes.
7. Left-Hand Techniques
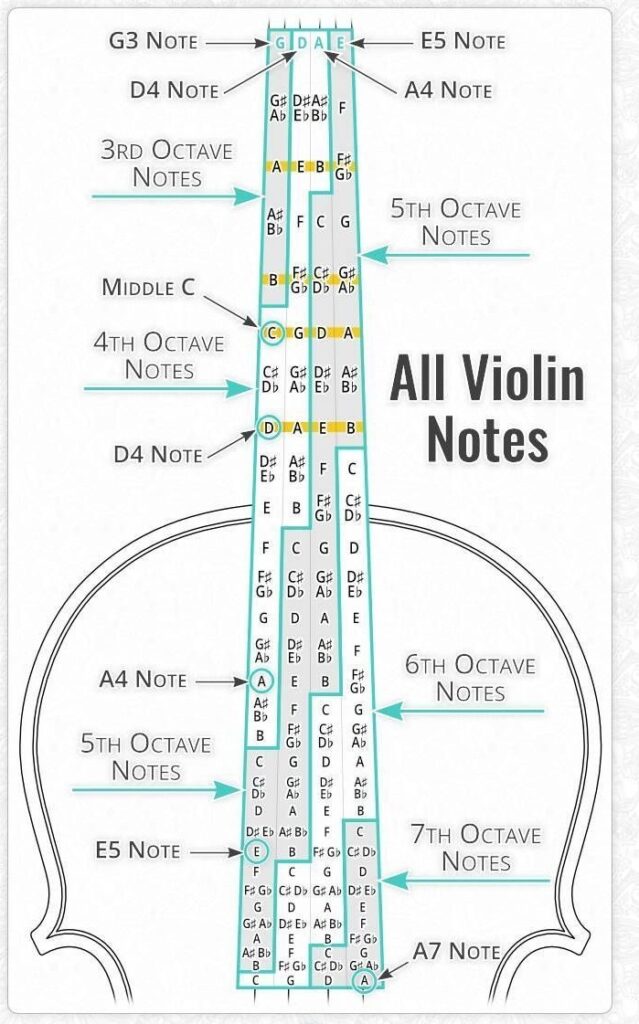
- Finger Placement: Learn the correct finger placement for each note. Use tapes on the fingerboard as a visual guide initially.
- Scales and Arpeggios: Practice scales and arpeggios to develop muscle memory and intonation.
8. Reading Music
- Sheet Music Basics: Familiarize yourself with the staff, clefs, note values, and rests.
- Simple Pieces: Start with simple melodies and gradually progress to more complex pieces.
9. Developing Good Practice Habits
- Regular Practice: Aim for consistent, daily practice sessions. Even short, focused practice is more beneficial than infrequent, long sessions.
- Warm-Up: Begin with warm-up exercises to prevent strain and improve flexibility.
- Goal Setting: Set specific, achievable goals for each practice session.
10. Listening and Imitation
- Listen to Professionals: Listen to recordings of professional violinists to understand tone and style.
- Imitate: Try to imitate the sound and phrasing of the pieces you listen to.
11. Patience and Persistence
- Be Patient: Progress may be slow initially, but persistence pays off. Celebrate small victories along the way.
- Seek Feedback: Regularly seek feedback from teachers or experienced players to improve your technique.
12. Joining a Community
- Find a Teacher: Consider taking lessons from a qualified violin teacher who can provide personalized guidance.
- Group Playing: Join an orchestra or chamber group to gain ensemble experience and enjoy playing with others.
Final Thoughts
Learning the violin is a journey that requires dedication and practice. By following these steps and maintaining a positive attitude, you’ll steadily improve and find joy in your progress. Remember, every great violinist started as a beginner—keep striving, and enjoy the beautiful music you create.
- Why Guitar Chords and Staff Notation Don’t Match Each Other
- 🎶 Flute Lesson for Beginners: Learn Your First Notes Easily
- Homesteading Knowledge: Back-to-Basics Skills for Self-Reliant Living
- 🎸 Dmaj7 Guitar Chord: A Smooth and Dreamy Sound for Your Songs
- July 5th in America: The Quiet Day After the Boom