

Applying a Tru-Oil finish for the first time can feel exciting until unexpected streaks or scuff marks appear after the first coat. Many first-time builders notice visible wipe marks, uneven sheen, or faint scratches that weren’t noticeable before applying the oil. Fortunately, in most cases, these marks are completely normal and can be corrected with proper finishing techniques.
If you’re wondering whether Tru-Oil streaks disappear with additional coats or whether you should sand them immediately, this guide explains exactly what’s happening, why it occurs, and how to achieve a professional-looking finish.
Why Does Tru-Oil Show Streaks After the First Coat?
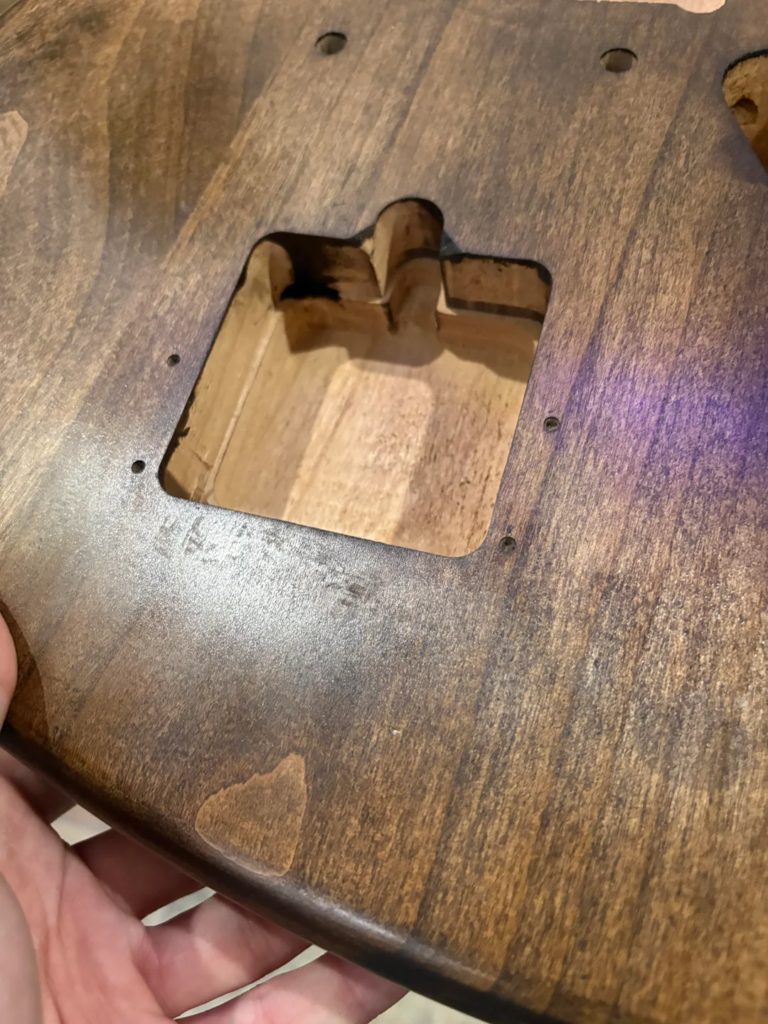
The first coat of Tru-Oil penetrates deeply into bare wood. As the oil wets the surface, it highlights imperfections that were already present but invisible on unfinished wood.
Common causes include:
- Sanding scratches revealed by the oil
- Uneven sanding progression
- Applying too much Tru-Oil
- Wiping with excessive pressure
- Dust contamination
- Oil beginning to cure while wiping
- Uneven wood grain absorption
This is especially common on:
- Maple
- Mahogany
- Walnut
- Ash
- Alder
- Roasted maple necks
The first coat rarely looks perfect.
Is This Normal?
Yes.
Nearly every experienced guitar builder expects the first coat to look uneven.
Typical first-coat appearance includes:
- Streaks
- Glossy and dull patches
- Minor wipe marks
- Raised grain
- Uneven reflection
- Visible sanding scratches
As multiple thin coats build up, the finish gradually levels itself.
What Causes Visible Scuffs?
Scuff-like marks usually come from one of these sources:
1. Sanding Scratches
The most common reason.
If the wood wasn’t sanded through a consistent grit progression (for example 180 → 220 → 320 → 400), Tru-Oil will highlight every scratch.
2. Raised Grain
The oil causes wood fibers to swell slightly.
This makes the surface feel rough even if it was perfectly smooth beforehand.

3. Thick Application
Applying too much oil creates:
- streaks
- uneven curing
- glossy patches
- drag marks
Thin coats always produce better results.
4. Dirty Cloth
Lint or contaminants trapped in the applicator can leave visible marks.
Many builders prefer:
- lint-free cloth
- coffee filters
- microfiber
- folded paper towel
- nitrile-gloved fingertip
5. Dry Wiping
Continuing to wipe after the oil begins curing causes streaking.
Once the oil starts getting tacky:
Stop wiping.
Leave it alone.

Should You Sand After the First Coat?
Usually yes.
After allowing the finish to cure for 24 hours:
Lightly level the surface using:
- 0000 steel wool (avoid around pickups)
- Grey Scotch-Brite pad
- 800-1000 grit sandpaper
- Micromesh
Only remove surface roughness.
Do not sand through the finish.
Will More Coats Hide the Marks?
Usually yes.
Minor streaks almost always disappear after:
- Coat 3
- Coat 4
- Coat 5
As long as each coat is:
- thin
- fully cured
- lightly leveled
Deep scratches, however, will not disappear completely.

Proper Tru-Oil Application Technique
For the smoothest finish:
Step 1
Apply only a few drops.
Less is better.
Step 2
Spread into an extremely thin film.
You should almost wonder whether enough oil is on the surface.
Step 3
Wipe with the grain.
Avoid circular motions.
Step 4
Leave it alone.
Don’t keep touching areas that have begun drying.
Step 5
Allow a full cure.
Most builders wait:
- 12-24 hours between coats
Humidity may require longer.
How Many Coats Should You Apply?
Typical builds require:
| Finish Style | Recommended Coats |
|---|---|
| Satin | 4-6 |
| Semi-gloss | 6-10 |
| High gloss | 10-20 |
Patience produces the best finish.
If the Marks Don’t Disappear
If streaks remain after several coats:
Option 1
Level sand with:
- 1000 grit
Then continue applying oil.
Option 2
If the finish has obvious ridges:
Wet sand using Tru-Oil as lubricant after several cured coats.
This creates a slurry that fills grain and levels the finish.
Option 3
If sanding scratches are very deep:
Sand back to bare wood.
Re-sand correctly.
Restart.
While frustrating, it’s often the fastest path to a flawless finish.
Can You Buff Tru-Oil?
Absolutely.
After the final coat has cured for:
- 7-14 days
You can polish using:
- Micro-Mesh (1500-12000)
- Fine polishing compound
- Automotive swirl remover
- Guitar polishing compound
This produces a deep gloss without removing significant finish thickness.
Common Beginner Mistakes
Avoid these frequent errors:
- Applying thick coats
- Sanding before the finish cures
- Using dusty rags
- Touching partially cured oil
- Skipping sanding grits
- Rushing between coats
- Applying finish in humid conditions
- Buffing too early
Frequently Asked Questions
Will the first coat always look bad?
Often, yes. The first coat exposes grain and sanding marks. Later coats dramatically improve the appearance.
Can I sand after every coat?
Yes. Very light leveling between cured coats helps create a smooth finish.
Why does the finish feel rough?
Raised grain and tiny dust particles are common after the first coat. Light leveling solves the problem.
How long should Tru-Oil cure before polishing?
For best results, wait at least 7 to 14 days after the final coat before buffing to a high gloss.
Can I fix streaks without stripping the finish?
In most cases, yes. Thin additional coats followed by light leveling are enough to eliminate minor streaks.
Final Thoughts
Seeing streaks or scuff marks after the first coat of Tru-Oil is usually part of the finishing process, not a sign that you’ve ruined the project. The first coat reveals imperfections, raises the grain, and can appear uneven while the finish begins building. By applying thin coats, allowing proper curing time, lightly leveling between applications, and resisting the urge to overwork the surface, you can achieve a smooth, durable, professional-looking finish. Patience is the secret ingredient. The best Tru-Oil finishes are built gradually, one thin coat at a time.
- Best Guitar Strings for Beginners in 2026
- Essential Beginner Guitar Chords Chart: Start Playing Today
- Your First Beginner Guitar Lessons: A Simple Guide
- How Often Should You Change Your Guitar Strings: A Guide
- Guitar Amp Settings Explained for New Players
